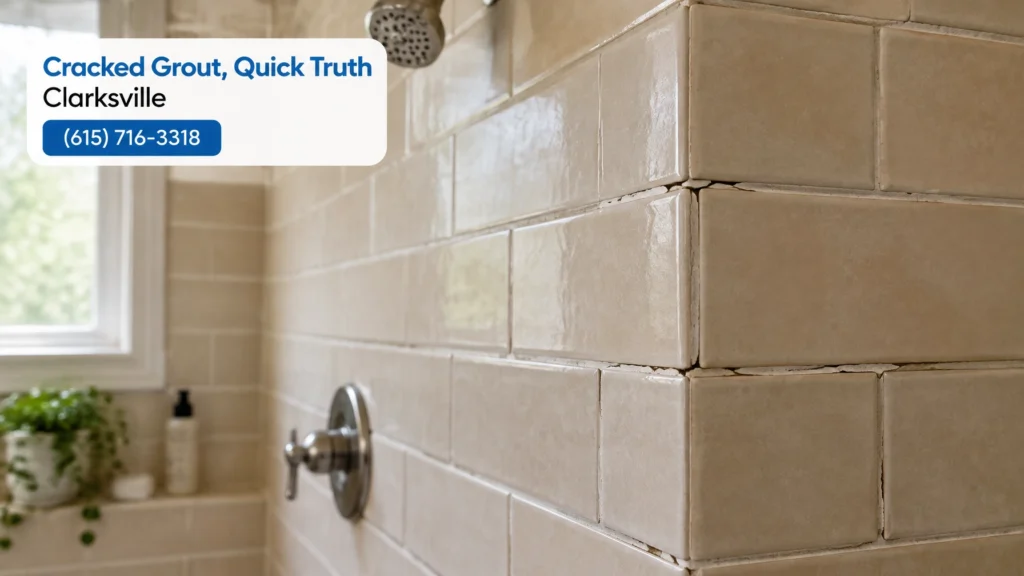
1. Why Shower Grout Cracks First
Shower grout can crack when the materials around it move. House settling, shifting tile, or a thin or poorly packed original joint can leave grout with little room to hold together. Hot shower cycles also make tile and the wall behind it expand and contract.
Moisture behind the tile can weaken the surface, too. Grout isn’t a waterproof membrane, so a crack may be a sign to look closer, especially if it keeps returning in the same spot.
In older Sango and St. Bethlehem homes, original 1980s and 1990s shower installations may have thin grout joints that crack first. Fort Campbell rental turnovers can bring another familiar problem, a quick grout patch between tenants that doesn’t address why the joint failed.
A hairline crack may look minor, but it can feel unsettling when you’re not sure what’s behind it. Start by checking whether the surrounding tile is firm and whether the crack stays dry.
2. Tell Whether It’s Just a Crack or Something Worse
A small, stable crack in an otherwise firm, dry area may be suitable for a grout repair. Look closely for a hairline crack that catches a fingernail, crumbling grout, or a missing chunk. Note whether the line is narrow and isolated or spreading through several joints.
Press gently on the tile beside the crack. Don’t push hard. If the tile shifts or clicks, stop using the shower and get the area checked. A gentle tap can help you compare it with nearby tile. A hollow tap sound on one tile while others sound solid may point to a loose bond.
Watch for signs of water getting past the tile. A musty smell after a steamy shower, brown stains bleeding from the crack, or soft drywall beside the shower deserve attention. Stop and get it checked if the crack is wider than a credit card edge, grout is missing in a cluster, or a mold smell remains after cleaning.
In a Clarksville home near St. Bethlehem, a homeowner notices a hairline crack catching a fingernail and a musty smell after a steamy shower. Rather than treating it as a surface blemish, the homeowner pauses and arranges a closer check.

3. How to Repair Grout in a Shower, Step by Step
A limited grout repair can be a reasonable DIY job if the tile is firm and there are no warning signs of water damage. Get the joint clean and completely dry first. Don’t rush this part.
- Clean the crack and let the joint dry fully. Remove soap residue and loose material from the surface.
- Use a grout saw to rake out the loose, cracked grout. Work carefully so you don’t chip the tile or cut into the material behind it.
- Vacuum out the dust, then check that the joint is clean and dry.
- Choose matching sanded or unsanded grout to suit the joint width and tile. Follow the grout package directions for mixing.
- Use a grout float to press the new grout firmly into the joint. Pack it tight, then remove extra grout from the tile surface.
- Wipe away haze with a damp sponge in light passes. Don’t flood the joint or pull fresh grout back out.
Keep the shower dry for at least 72 hours before using it, and follow the grout manufacturer’s instructions if they require more time. Once the grout has cured, apply a penetrating grout sealer to the full repaired line. Follow the sealer directions, including whether it calls for a second coat.
Don’t slather caulk over a grout crack, leave cracked grout in place and paint over it, or shower on fresh grout early. Those shortcuts can hide the problem without giving the new grout a sound base.

4. When Cracks Keep Coming Back
Repeated cracks usually mean the joint is responding to movement or moisture that a surface patch won’t fix. If the same line splits again, or several nearby joints start crumbling, stop repeating the repair and get the tile and area behind it checked.
Pay attention to the corners where the walls meet the shower pan. A recurring crack there can be a sign of movement or a deeper moisture issue. Loose tile, soft drywall, stains, or an ongoing musty odor are reasons to leave the shower unused until the cause is clearer.
For prevention, run the bath fan for 20 minutes after showers and wipe down the walls after very hot showers. Check grout lines in spring and fall, and reseal the lines twice a year with a compatible penetrating sealer. A simple reminder on your calendar is enough.
If an odor is hard to trace, this guide to a smelly shower drain in a Clarksville home can help you consider another possible source. A musty smell from the wall area still needs a closer look.
5. What It Costs
A small DIY repair may cost about $20 to $40 for a bag of grout and a float, not counting items you already have. A professional shower regrout commonly costs a few hundred dollars, depending on the shower’s square footage, tile type, amount of grout removal, and how easy the area is to reach.
Repairs for water damage behind the tile cost more because the work may involve opening the area and fixing what’s underneath. These are broad planning ranges, not quotes. For another view of the work that can affect cost, see this tile and grout repair strategy for Clarksville.
6. When to Get Matched with a Pro
You don’t have to take the shower apart to decide whether something feels wrong. If a tile moves, grout is missing in several places, the wall feels soft, or stains and odor keep returning, get the area checked before covering it with new grout.
Fix It Quick Network matches homeowners in Clarksville and Montgomery County with vetted local pros. The Network doesn’t perform the repair. The pros in the network are licensed and insured. If you’re also keeping up with seasonal maintenance, this fall checklist for Clarksville homes and rental properties covers other areas to check around the home.
If you’d like, we can match you with a vetted local pro for free. Call or text (615) 716-3318, or request a free match online. A practical next step is to take a photo of the cracked line and press gently on the surrounding tile to see if anything moves.

FAQs
Can a small shower grout crack be repaired at home?
Yes, if the crack is limited, the tile is firm, and there are no signs of water damage. Remove loose grout, clean and dry the joint, and follow the new grout’s directions.
How long should new shower grout cure?
Wait at least 72 hours before showering, and check the grout package for its full cure instructions. Cooler or more humid conditions may affect drying time.
Should grout be sealed after a shower repair?
Cement-based grout generally benefits from a penetrating sealer after it has cured. Follow the grout and sealer instructions, including guidance on repeat coats.
What does a hollow sound from shower tile mean?
A hollow tap compared with nearby solid-sounding tile can suggest a loose bond. If the tile also moves or clicks when pressed gently, stop using the shower and get it checked.
When should a recurring grout crack be inspected?
Get it checked if the crack returns, grout is missing in a cluster, the tile moves, or there are stains, soft drywall, or a musty smell that cleaning doesn’t remove.